Part 1: The AI Quality Paradox
As someone who loves design, I’ve really enjoyed using tools like Lovable, Google's AI Studio Build, or Figma Make; the experience is breathtaking. You give these AI tools a very simple prompt and watch as a stunning, beautifully designed landing page materializes, complete with rich components, perfect imagery, and flawless typography.
The Gold Standard. All of these were generated with a simple, one-line prompt
The prompt:
Build an amazing, beautiful, and visually stunning landing page for a food delivery startup called "feedMe".
Google AI Studio Build
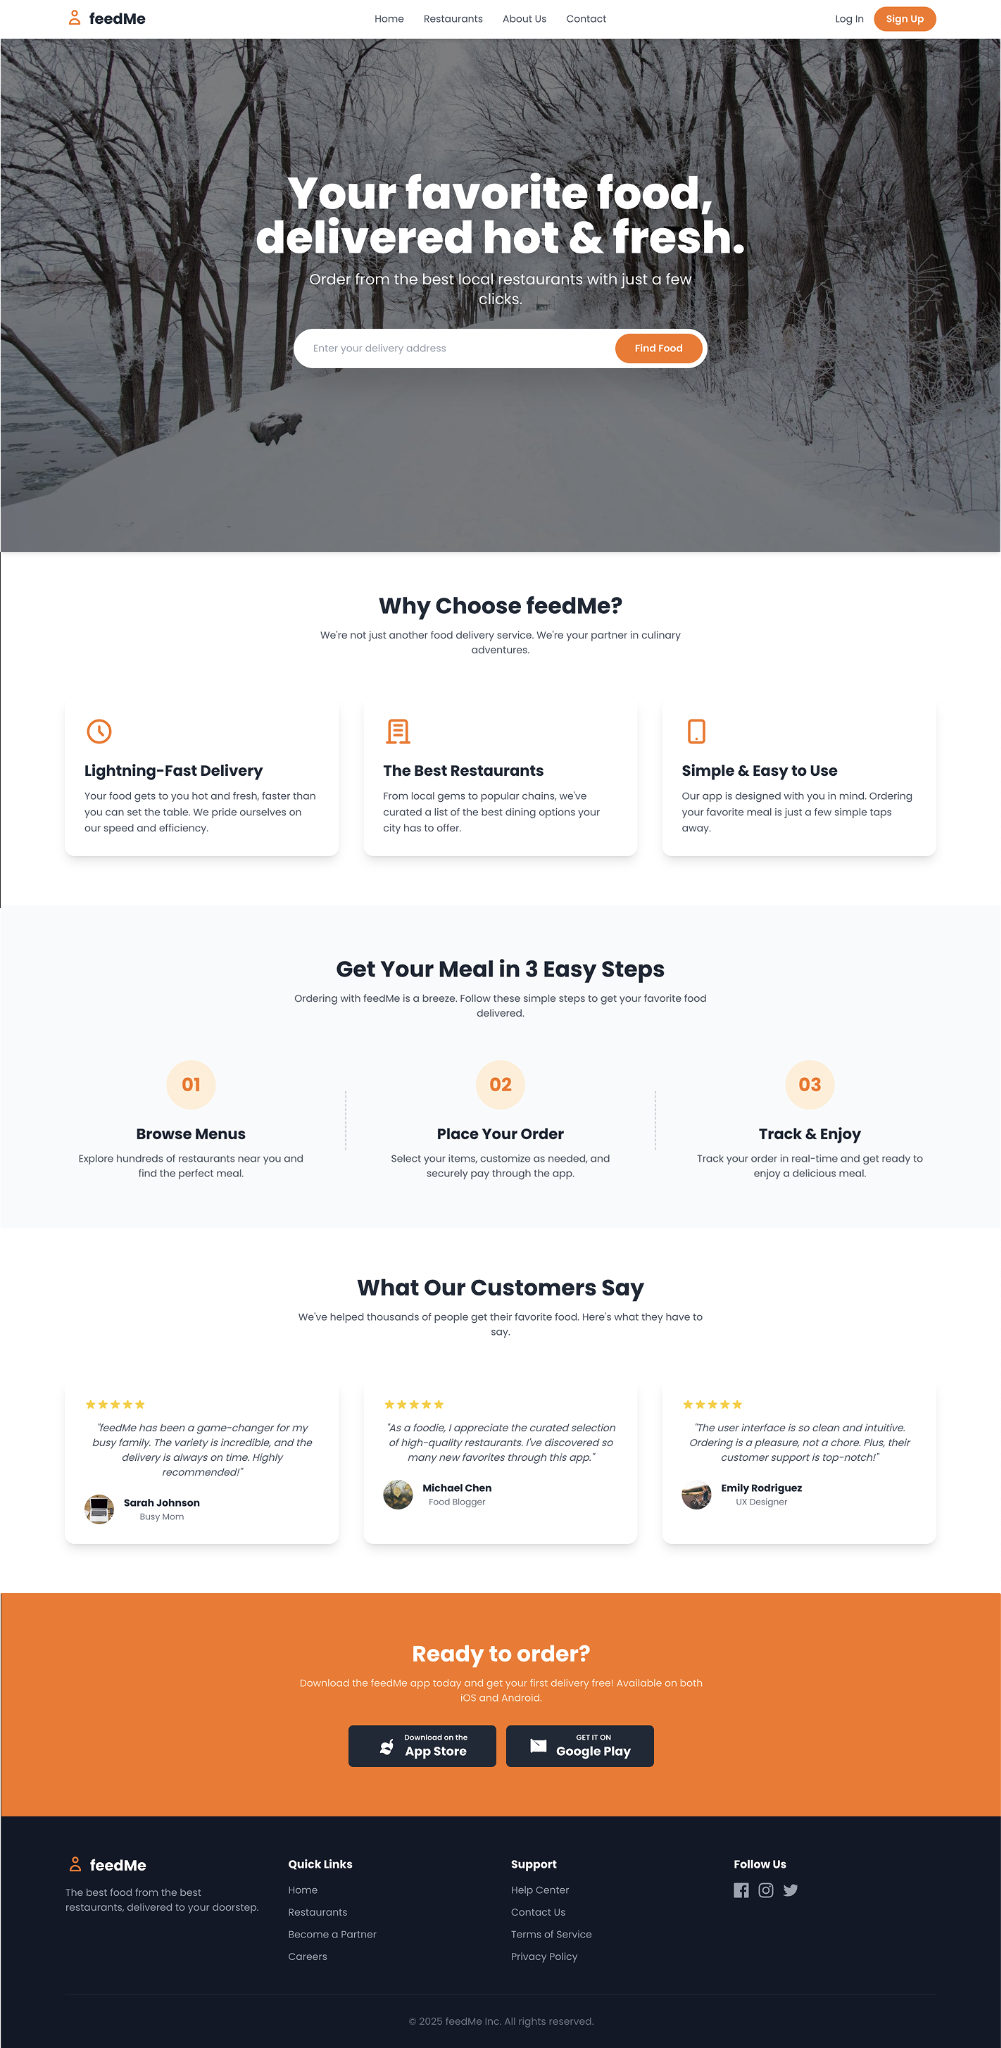
Lovable
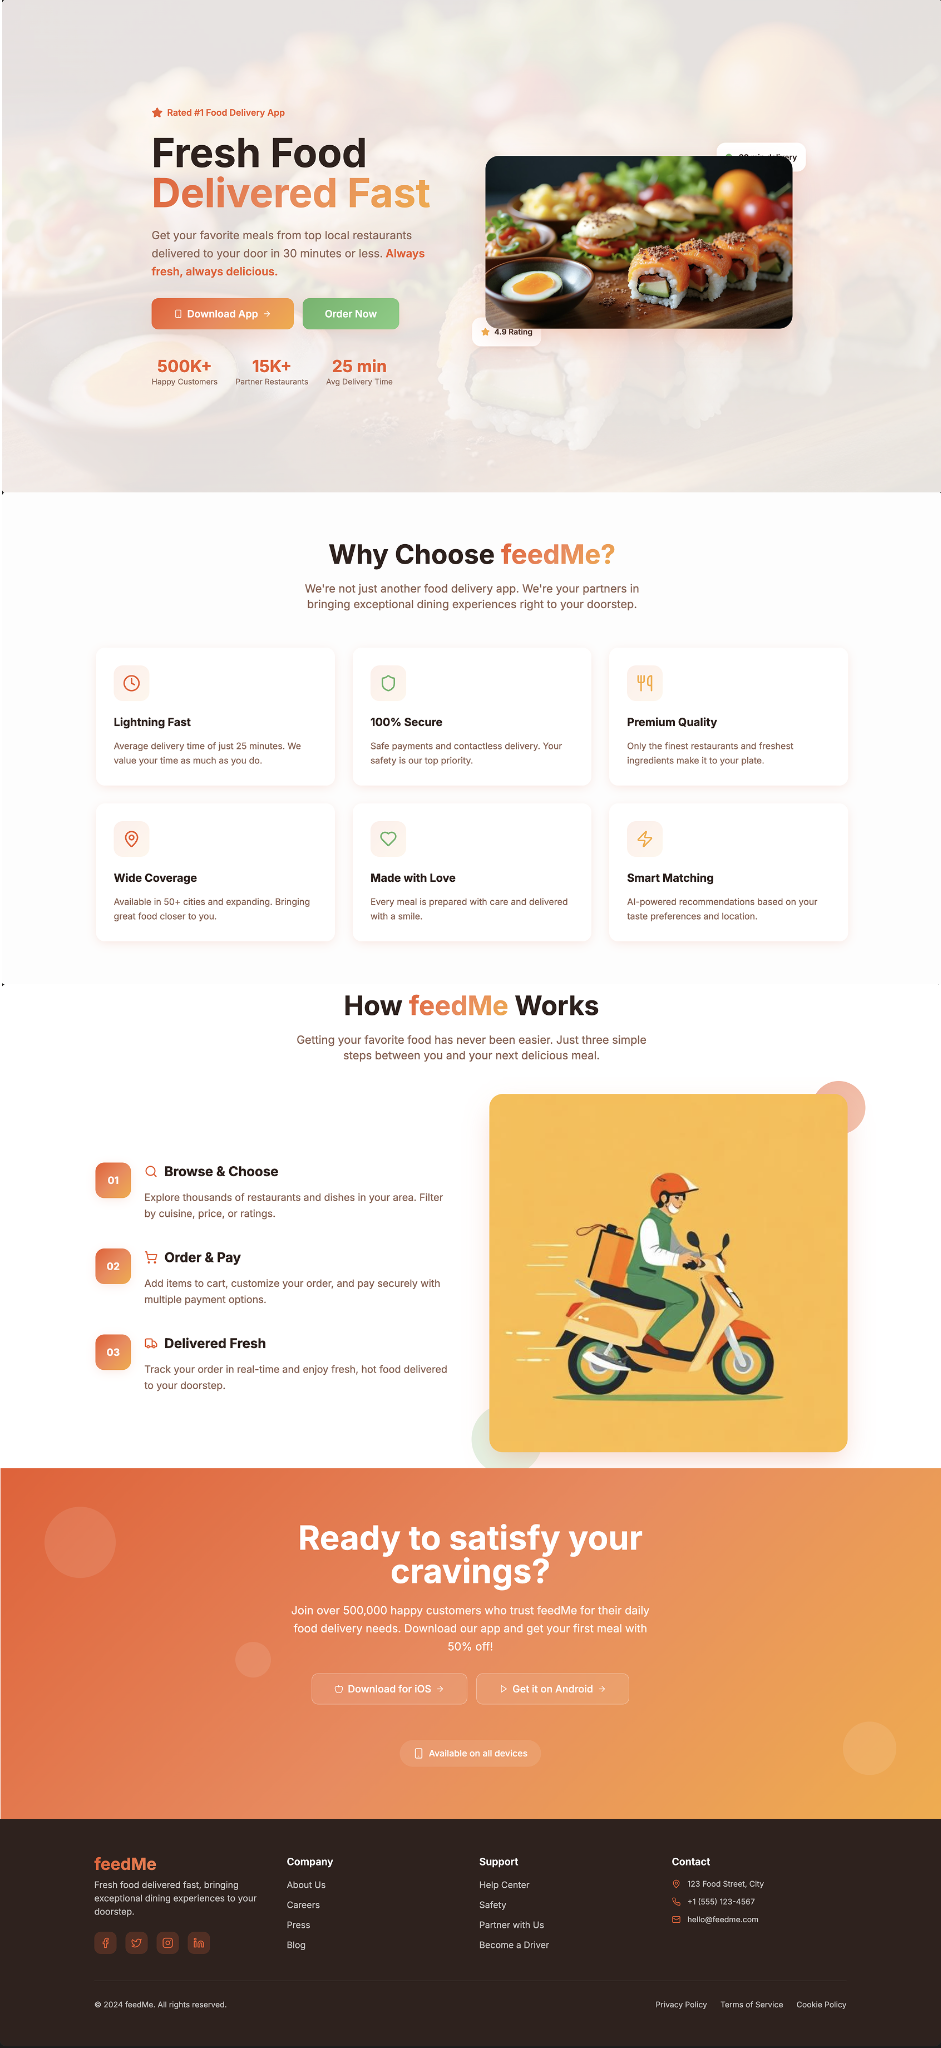
Cursor
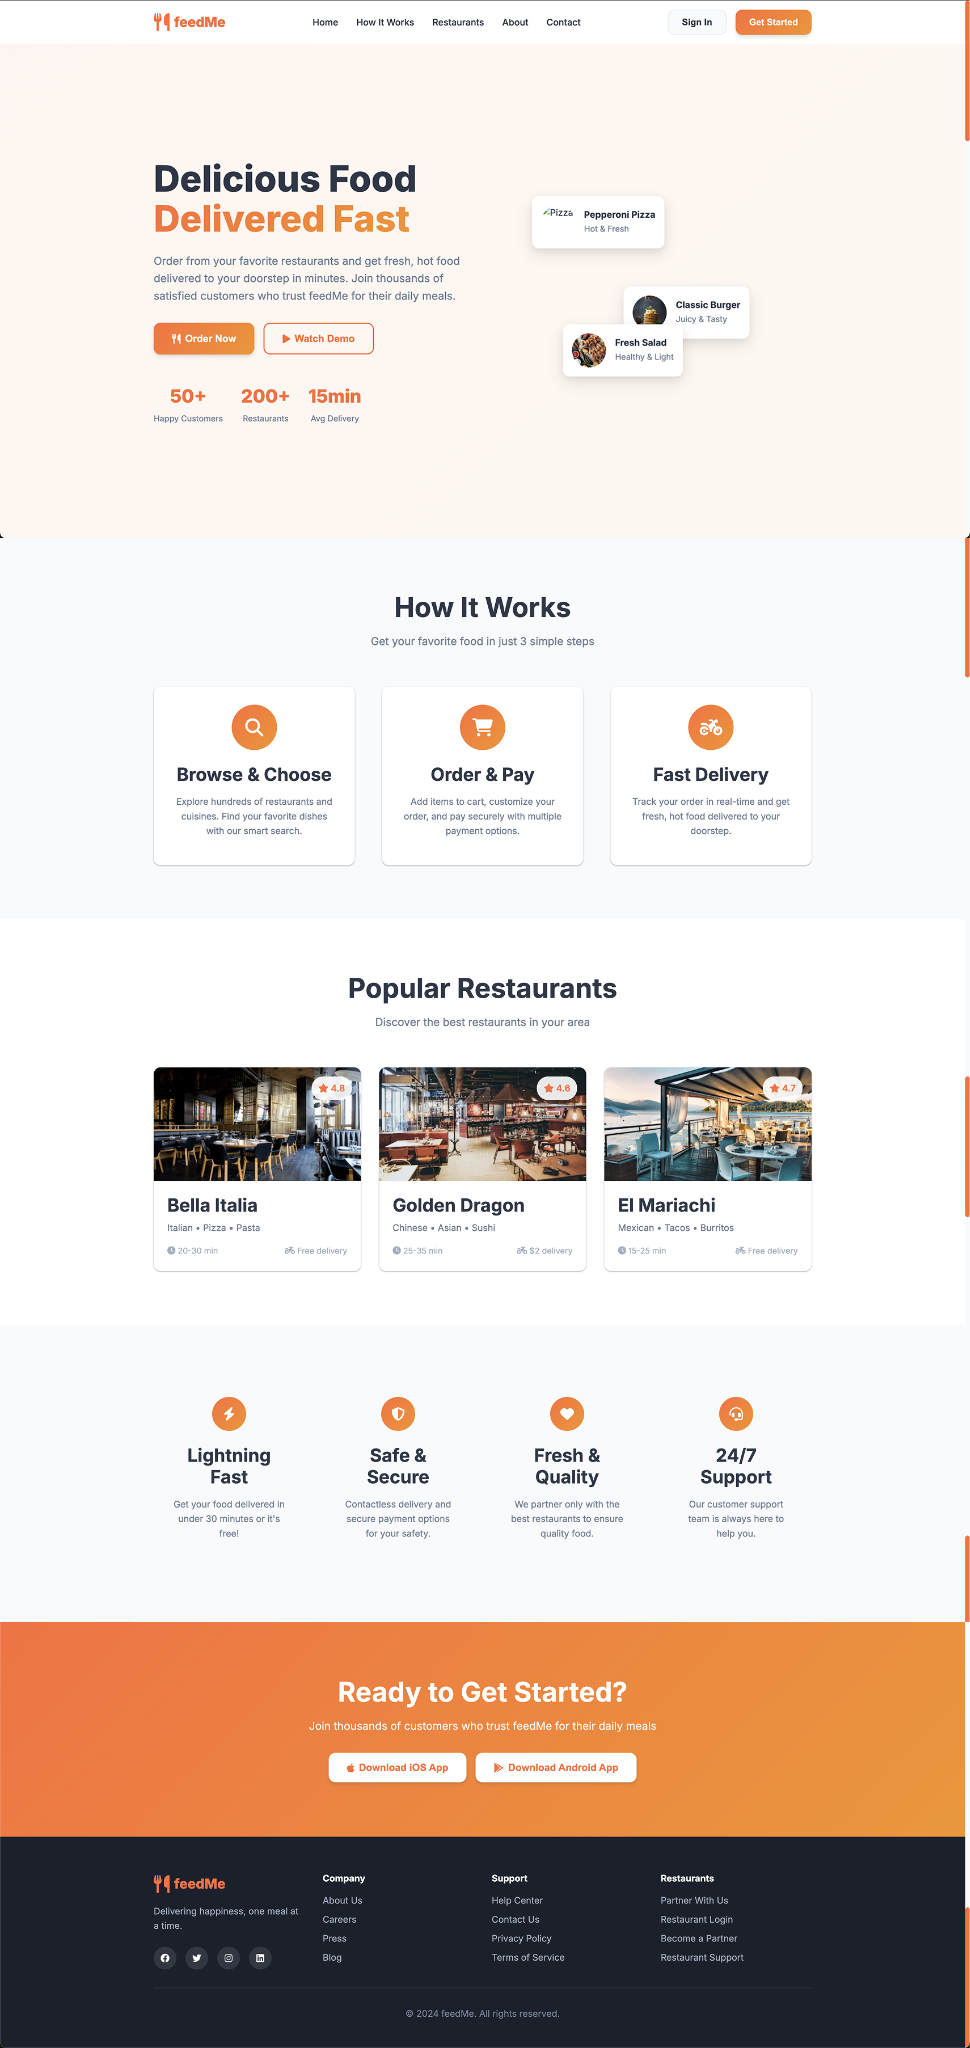
Figma make
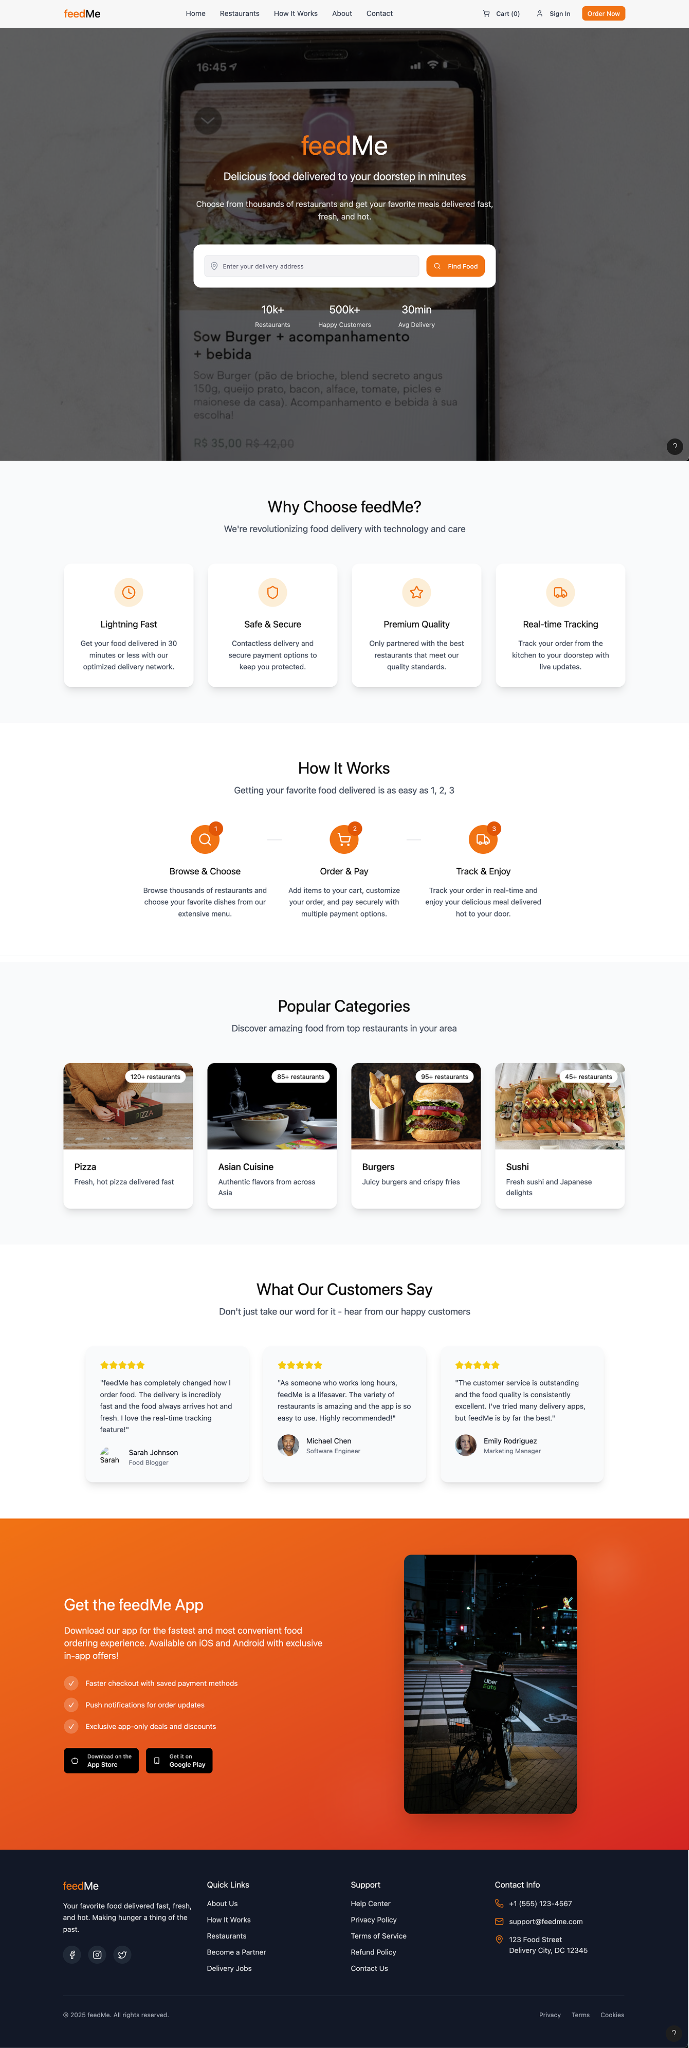
As a Product Manager and AI Product Builder, my first instinct is to replicate this power in my own projects. I got my API key for a high-performance coding model, set up a clean React project, called the API with that very same simple prompt, and eagerly awaited the magic.
And the result... was underwhelming.
Deepseek-V3.1 Free
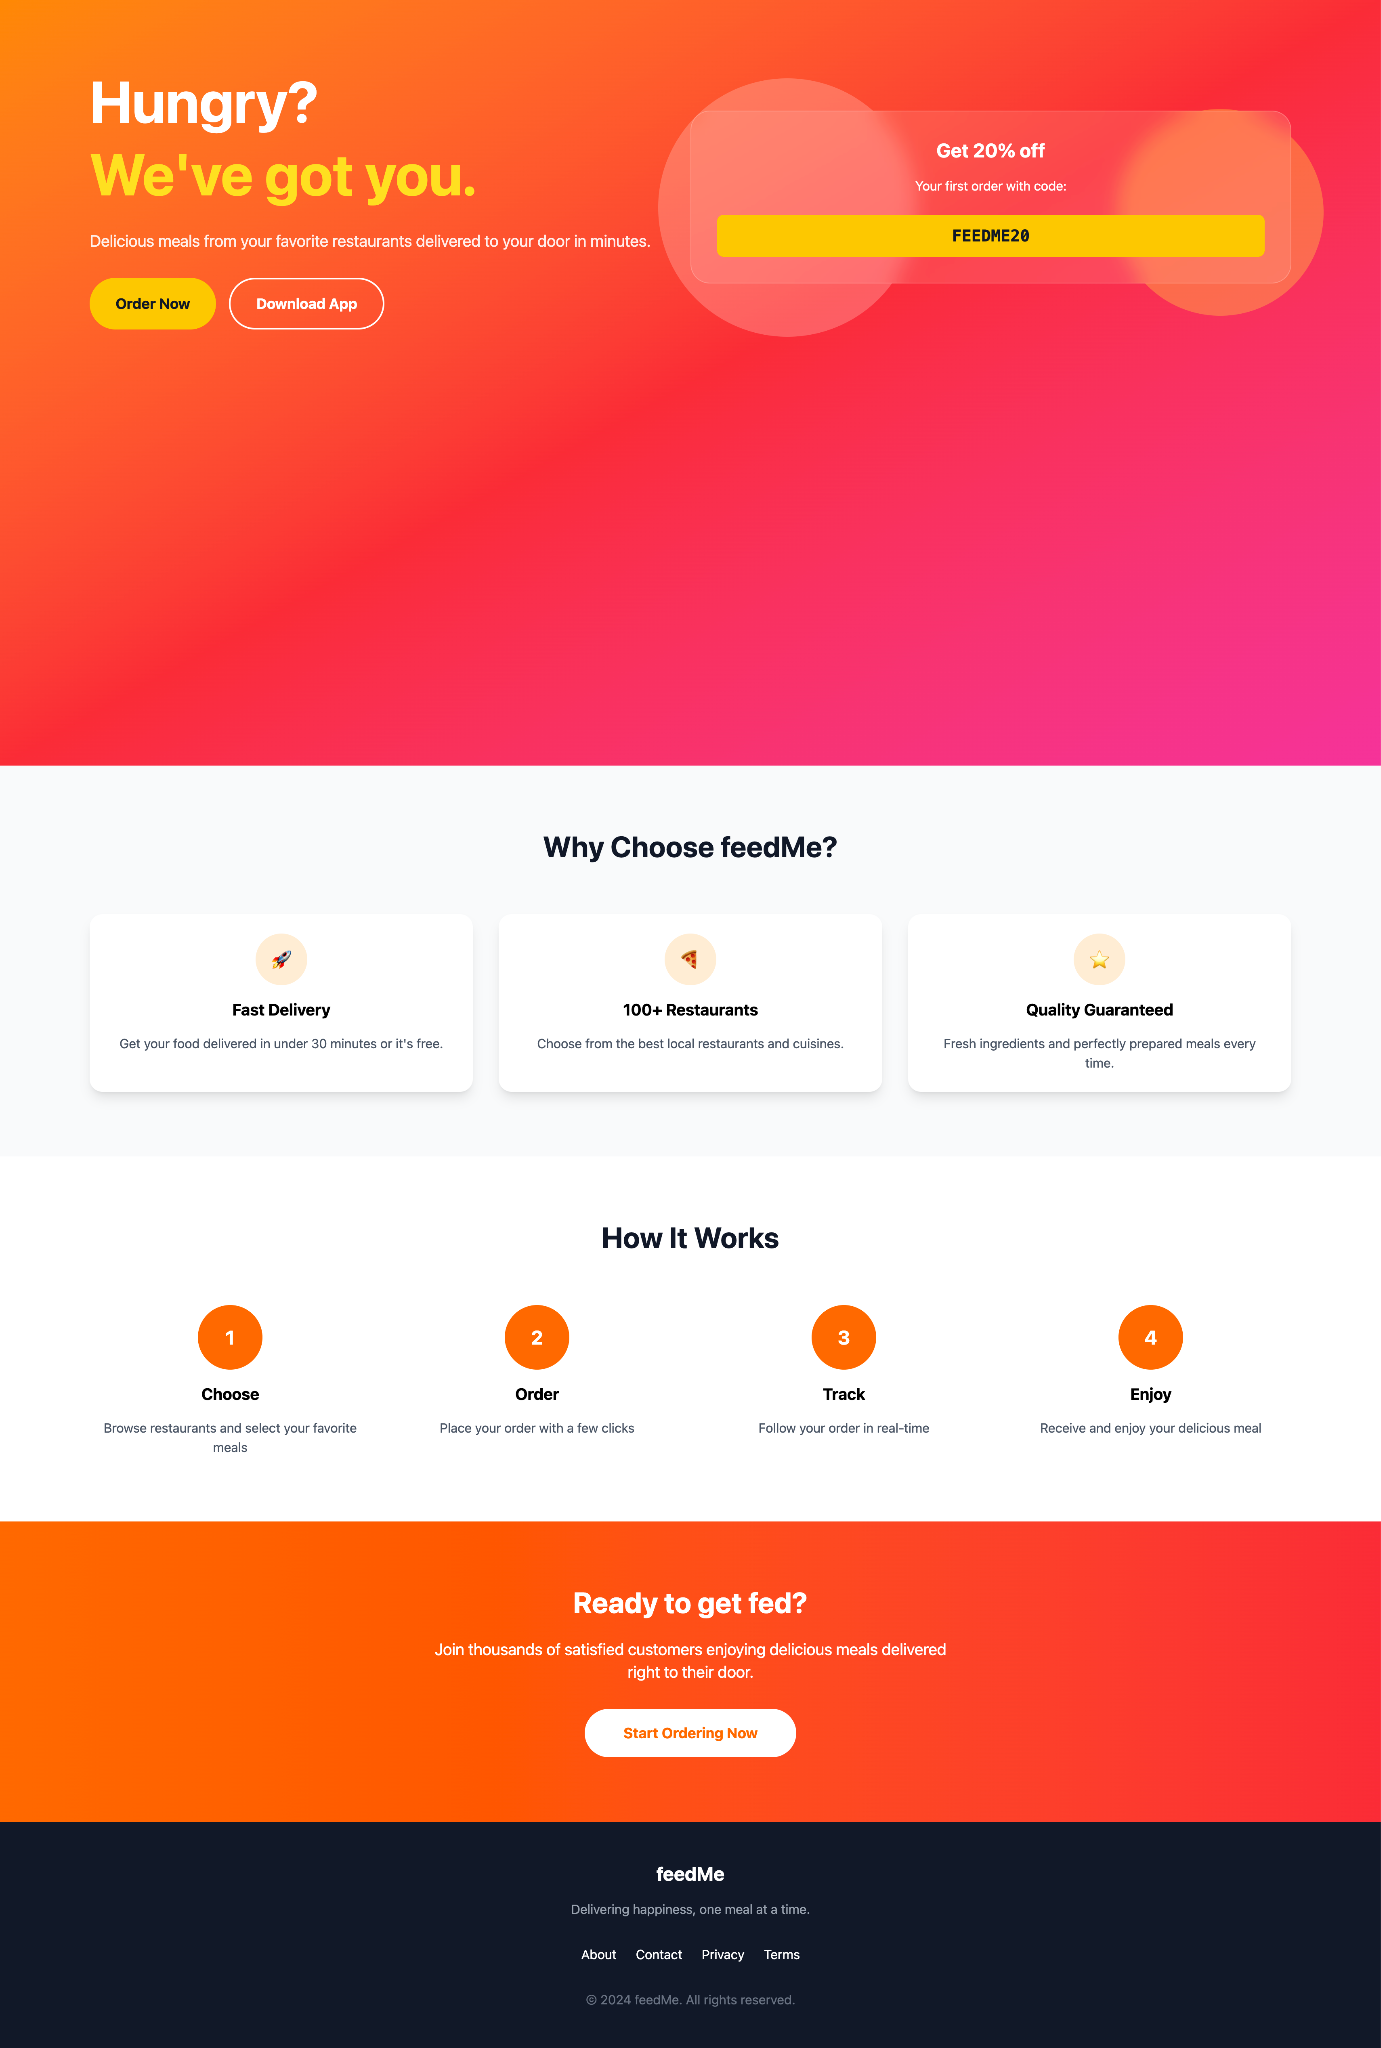
The difference is jarring. My result just doesn’t match up. This led me to a series of experiments to answer one question: How do you bridge the quality gap between specialized tools and a raw AI model?
I hypothesized that one of the secrets may be the environment. Those tools provide a rich, pre-built world of high-quality "Lego bricks" for the AI to build with. This guide is the story of my experiment to prove it.
Part 2: The Controlled Experiment - From a Pile of Mud to a Lego Castle
To ensure a fair test, I established some ground rules:
- The Environment: A clean React + Typescript + Tailwind CSS project.
- The Prompt: The same simple "feedMe" prompt would be used in every test, with a small instruction to only use the existing codebase.
- The Model: I chose Deepseek-V3.1, a capable and free model ranked #17 on the DesignArena Leaderboard (as of 30-08-25).
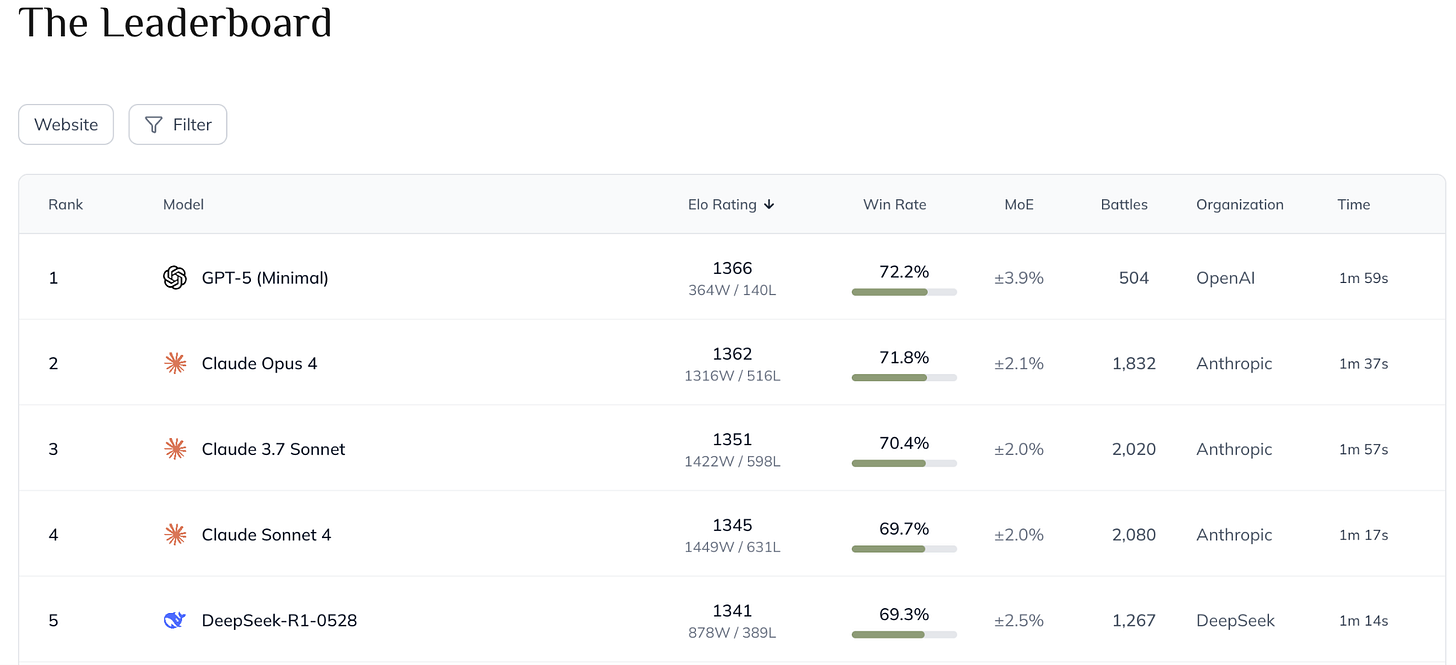
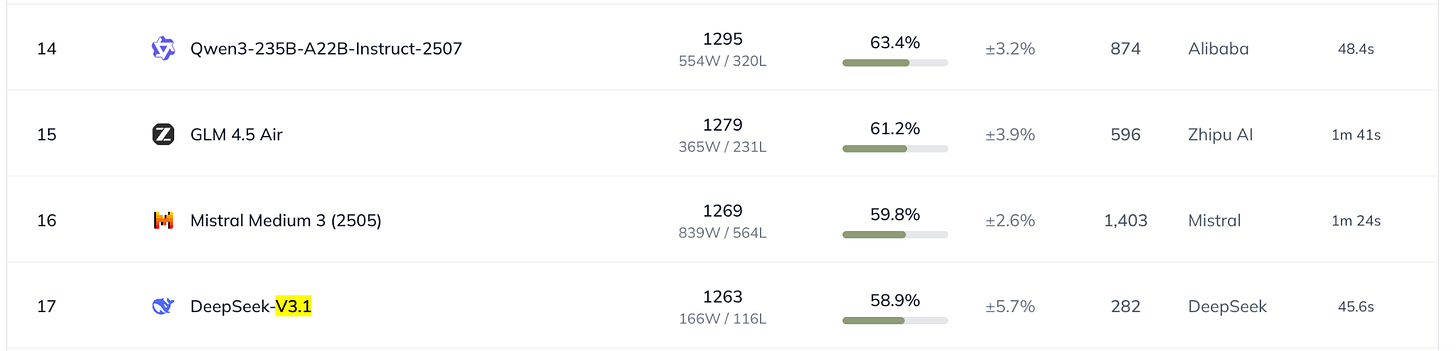
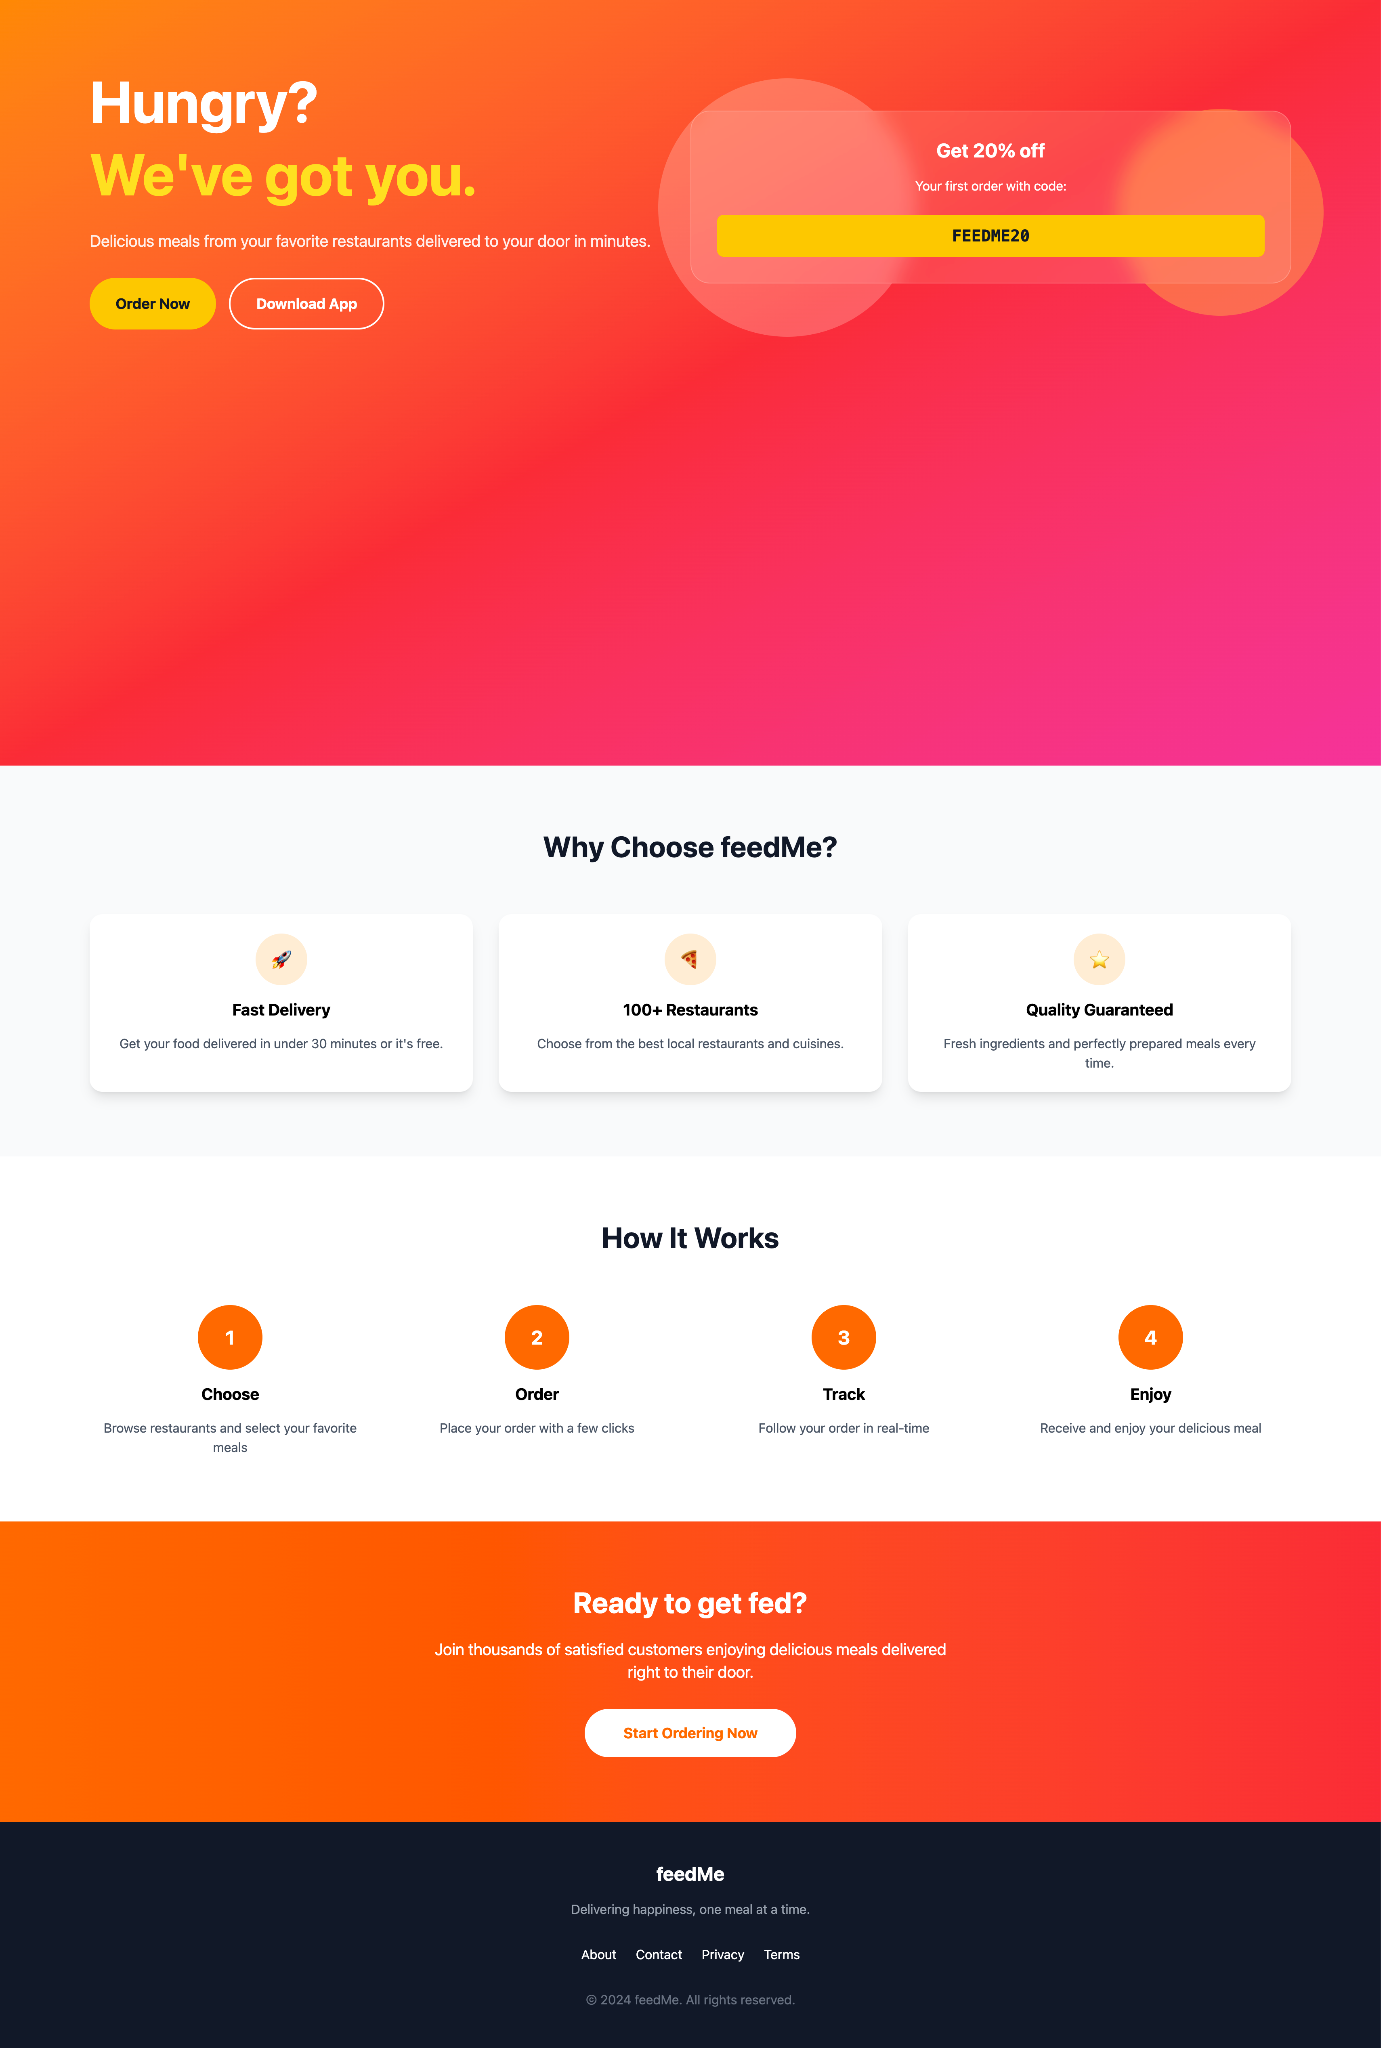
Experiment 0: (Empty Codebase - React + Typescript + Tailwind CSS)
This is the initial result shown above. With no "Lego bricks" to build with, the AI did its best with raw HTML and basic styles. This is our castle made of mud.
Codebase
React + Typescript + Tailwind CSS
Prompt
Using the full codebase, do not perform any new installation and do not create any new components, only use the current codebase as it is.
Build an amazing, beautiful, and visually stunning landing page for a food delivery startup called "feedMe".
Output
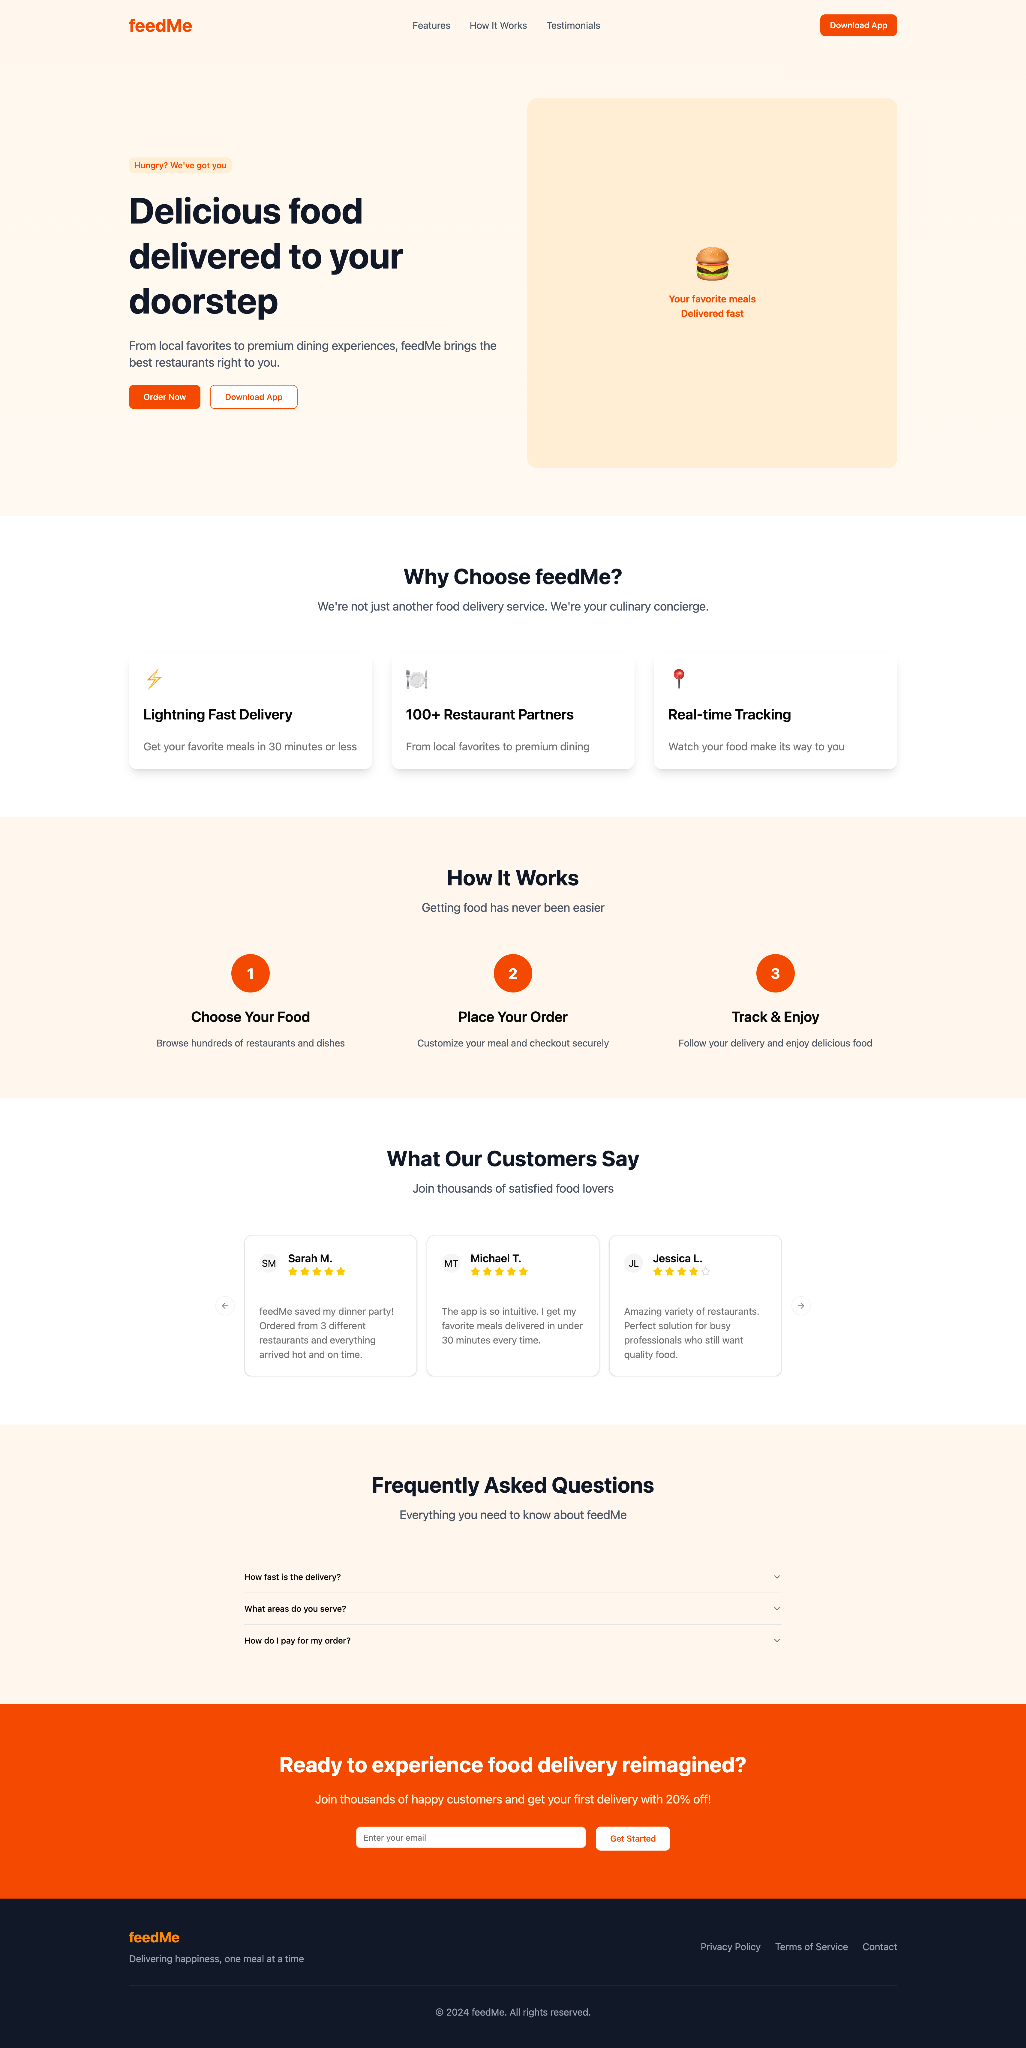
Experiment 1: Adding the First Box of Bricks (Shadcn UI)
The first and most important step is to give our AI a box of high-quality, pre-made bricks. I installed the full suite of Shadcn UI components, providing the AI with a professional design system to work with.
Codebase
React + Typescript + Tailwind CSS + Shadcn (all components)
Output
The Verdict
An instant and significant improvement. The AI immediately recognized and used the Button and Card components. The structure is cleaner, the elements are well-defined.
Experiment 2: Adding the Decorative Bricks (Local Images)
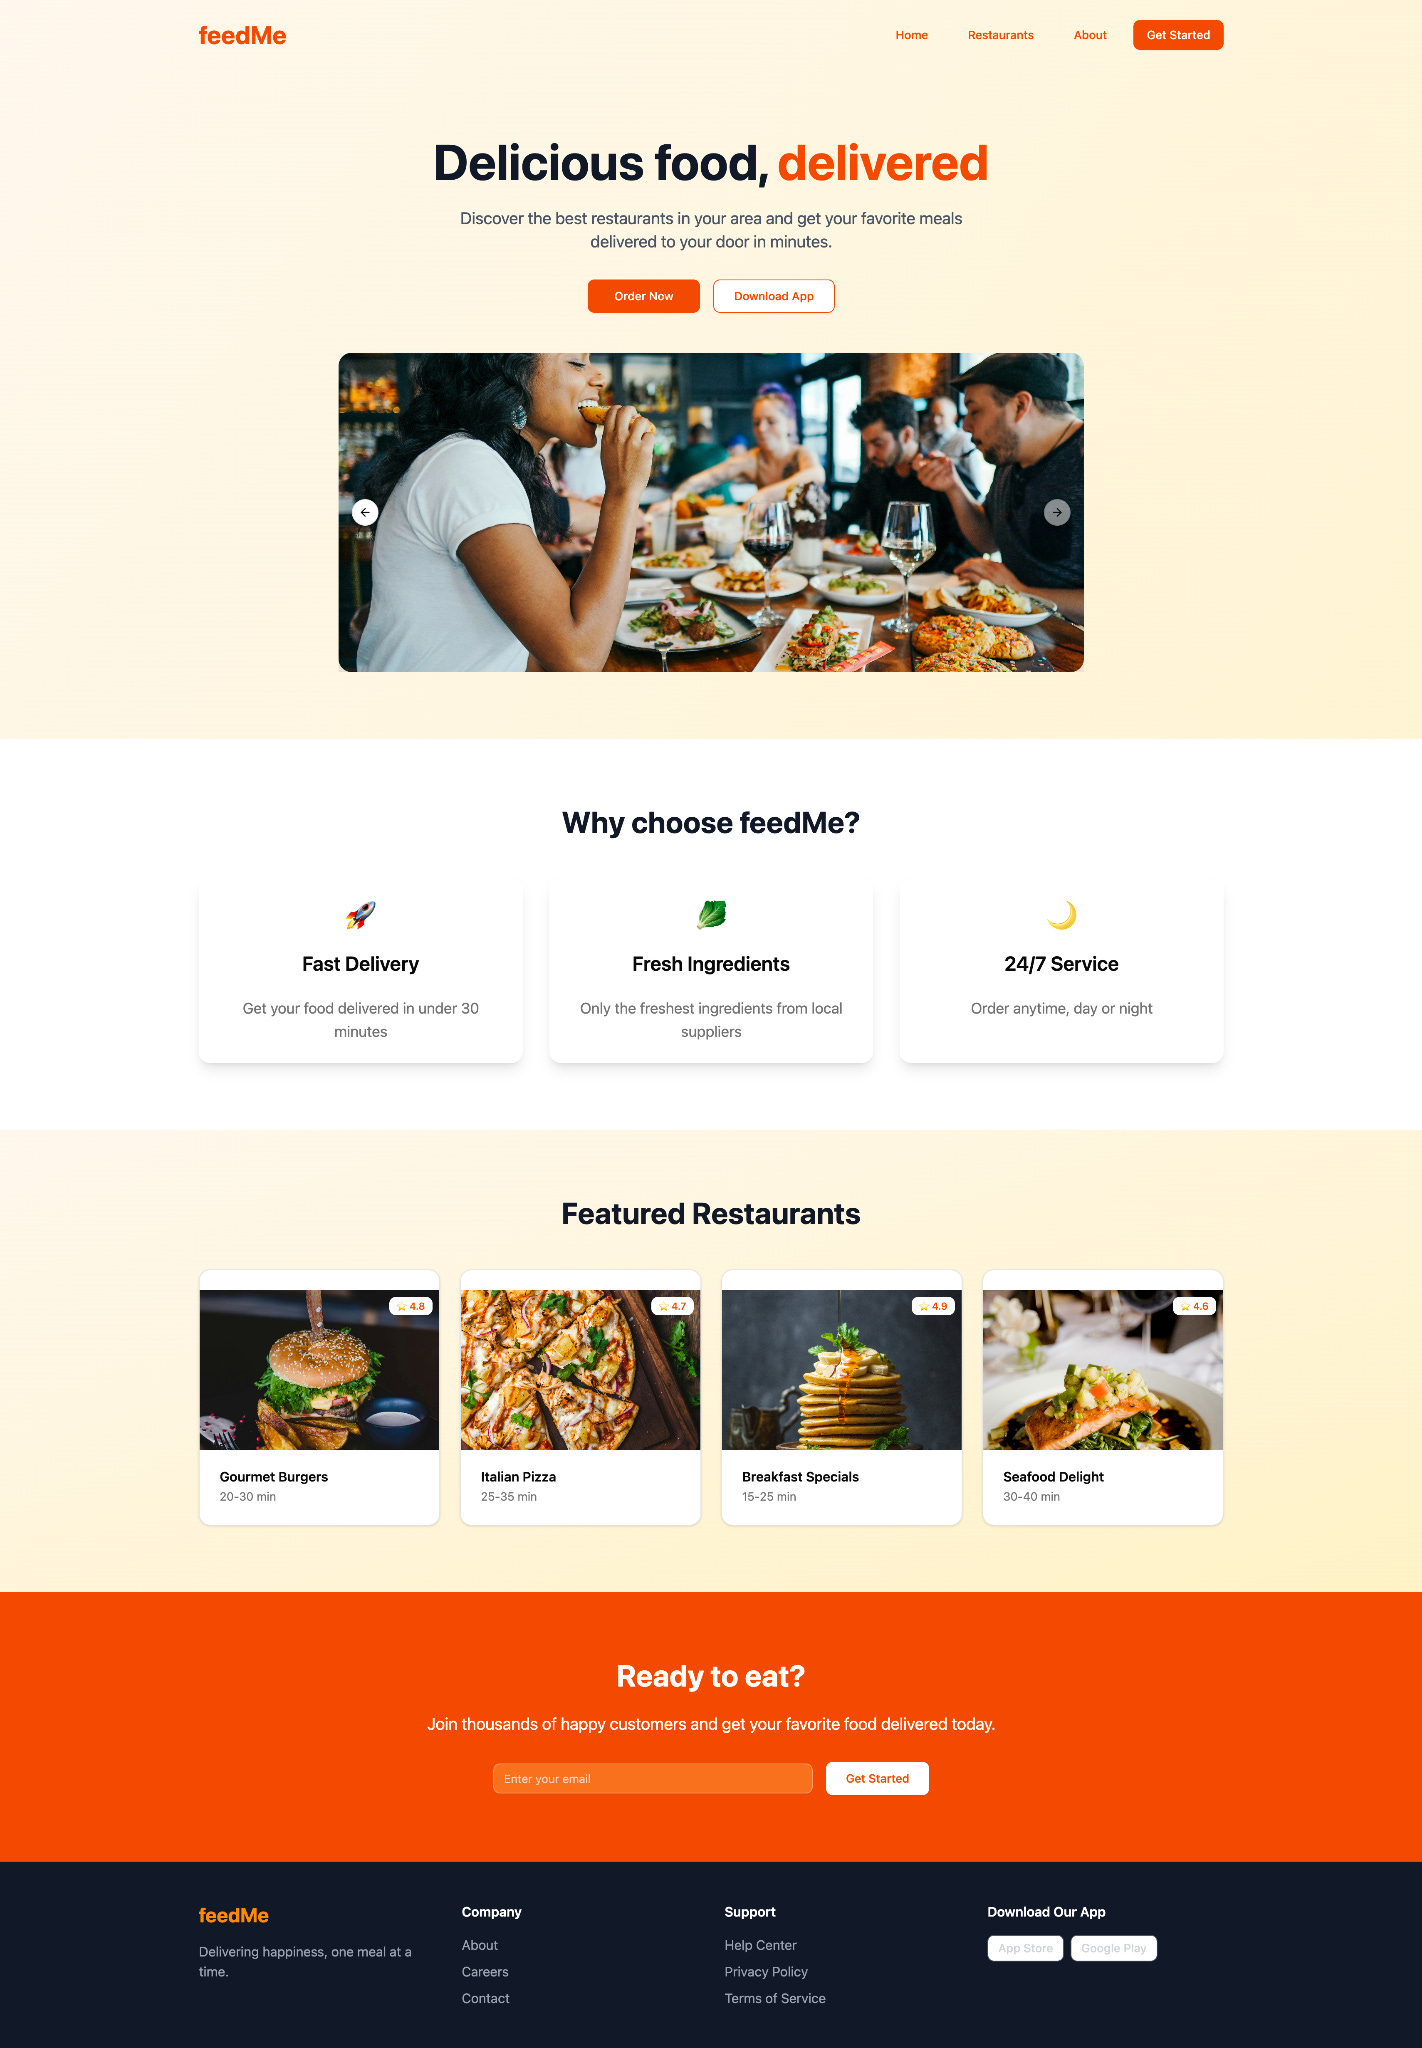
A Lego castle needs character: windows, flags, and textures. I downloaded several high-quality, royalty-free food images from Pexels, gave them descriptive names (e.g., hero-burger.jpg), and placed them in a public/assets folder.
Codebase
React + Typescript + Tailwind CSS + Shadcn (all components) + Images folder
Output
The Verdict
A massive leap in quality. The page now has context and personality. At this point, the quality is already comparable to what the specialized AI tools output. This shows that the biggest levers are components and images.
Experiment 3: Adding the Final Polish (Fonts, Icons & Animations)
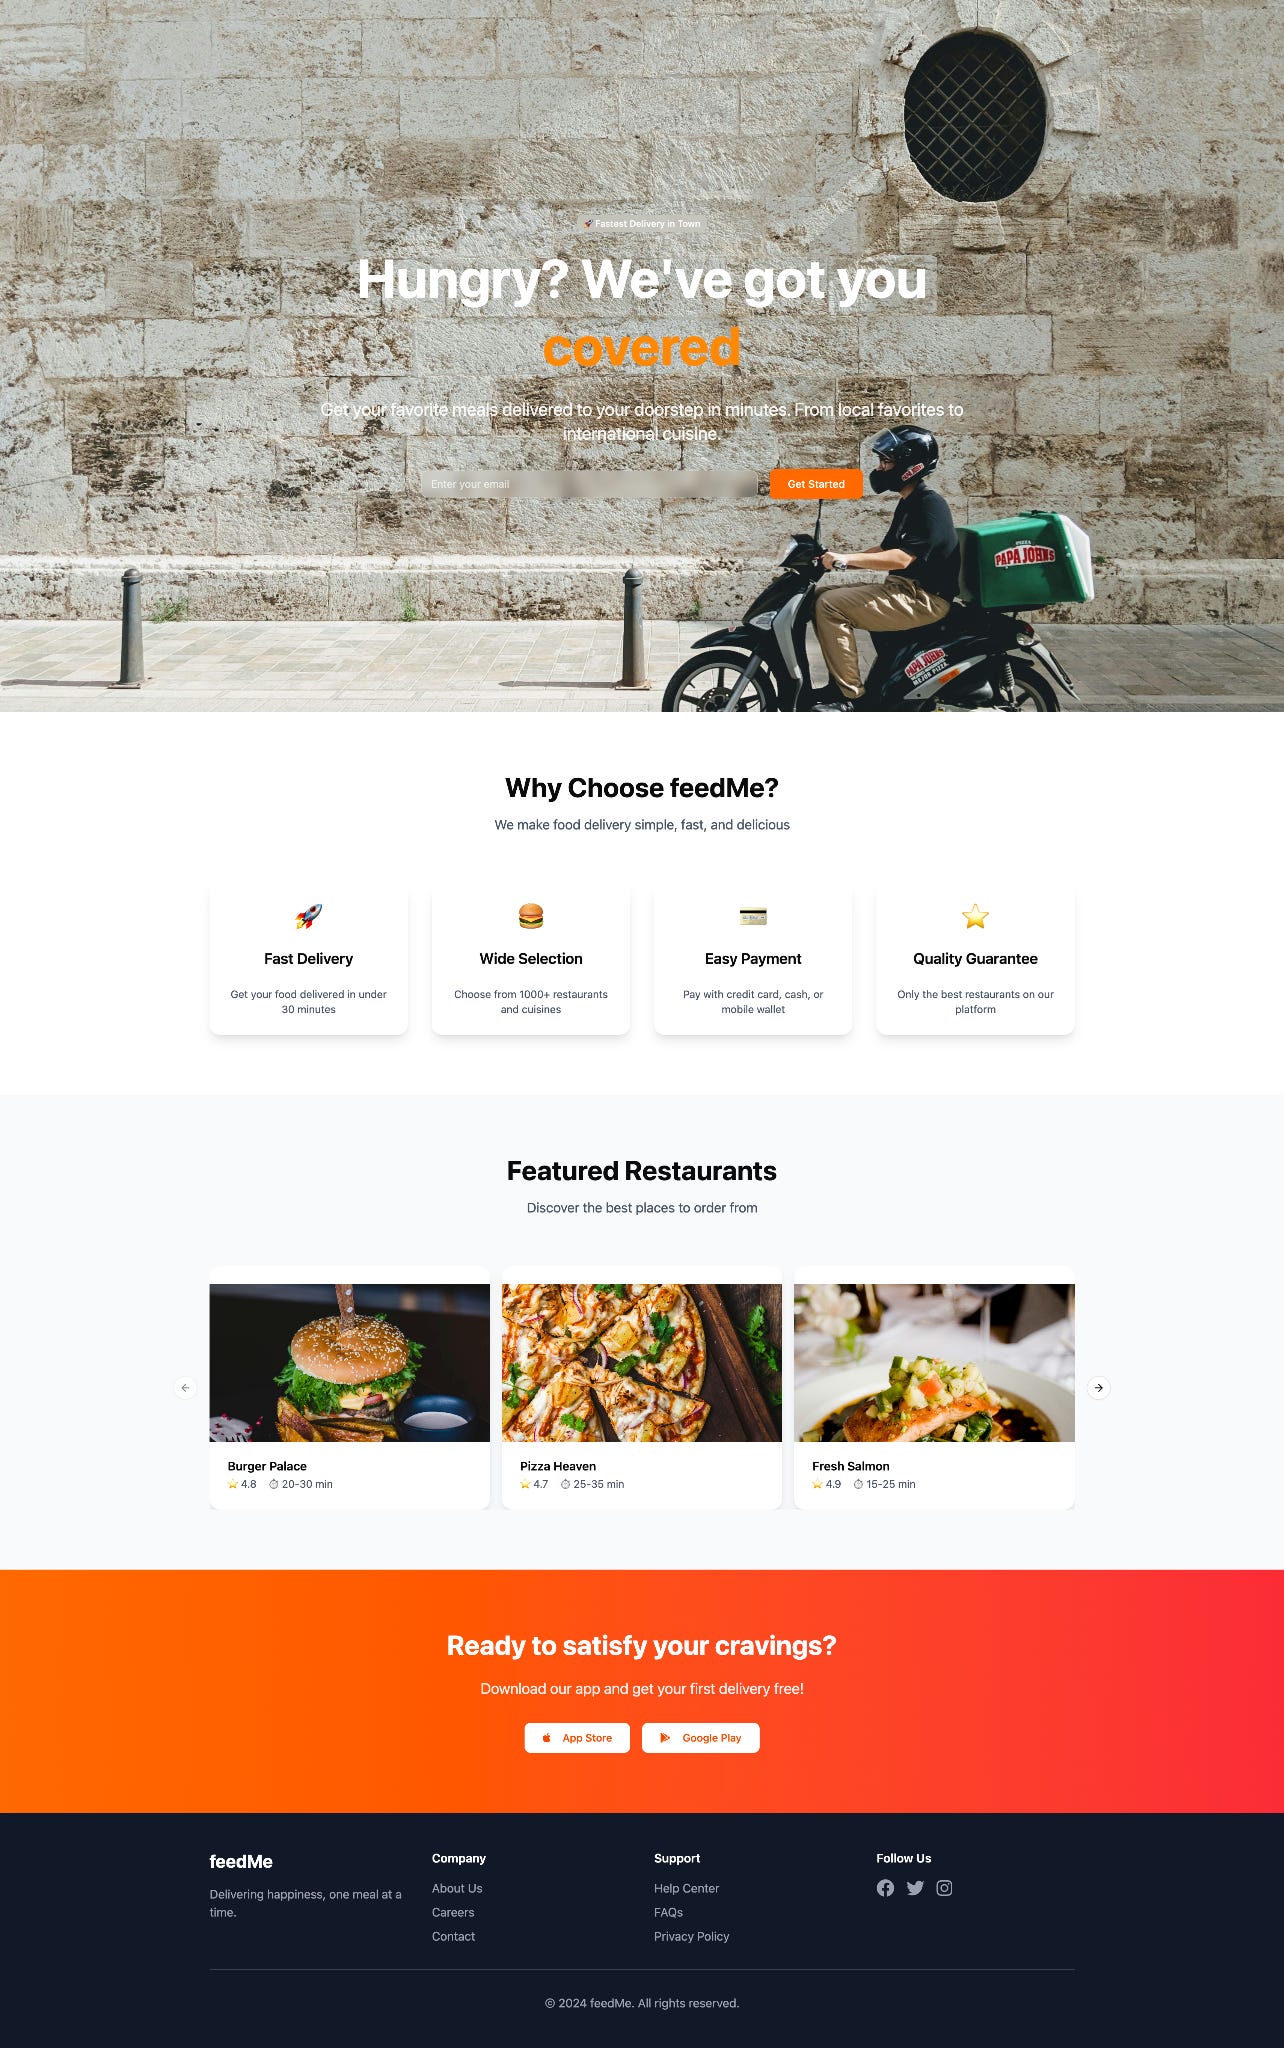
To elevate the feel of the design, I gave the AI more tools for polish: Google's 'Inter' font, Font Awesome for a wider icon selection, and several animation libraries (GSAP, AOS, simpleParallax.js).
Codebase
React + Typescript + Tailwind CSS + Shadcn (all components) + Images folder + Google Fonts - Inter + Font Awesome Icons + GSAP + AOS + simpleParallax.js
Output
The Verdict
This is the step that takes the design from good to amazing. It may not look wildly different in a static image, but the experience of using it felt more alive and professional.
Part 3: Pushing the Limits - Does the Toolkit Help All Builders?
The toolkit clearly works for a capable model like Deepseek. But how does it affect a master-class model and an older, less capable one?
The Master Builder Test: Claude Opus 4
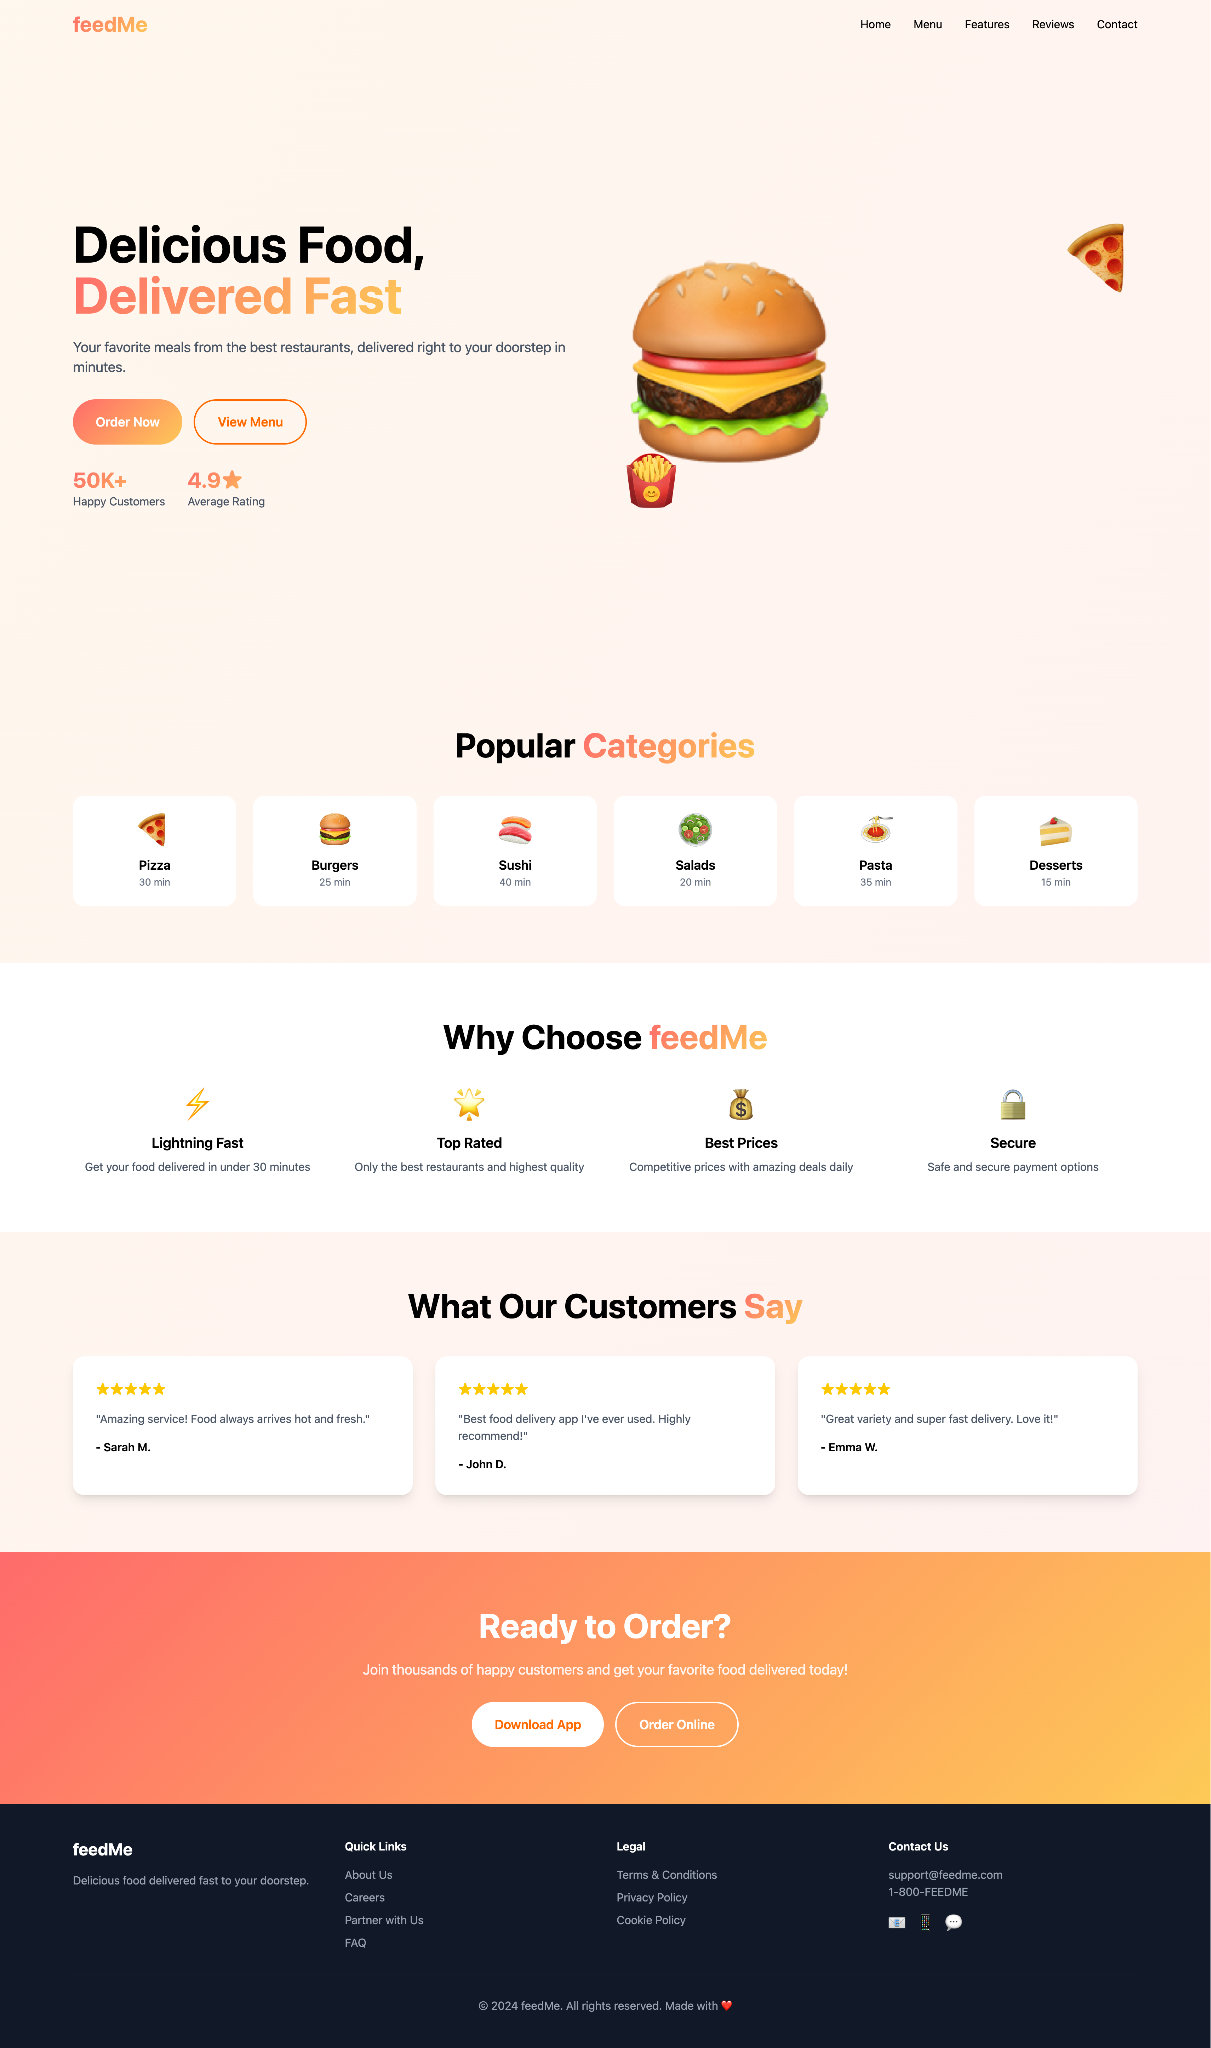
First, I gave the empty "pile of mud" codebase to Claude Opus 4, a top-tier model.
Codebase
React + Typescript + Tailwind CSS
Model
Claude Opus 4
Output
The Verdict
Quite decent. Even with nothing, Claude's innate capability allowed it to create a respectable layout with some clever use of icons and a floating effect.
Next, I gave Claude the full Lego set (our final codebase from Experiment 3).
Codebase
React + Typescript + Tailwind CSS + Shadcn (all components) + Images folder + Google Fonts - Inter + Font Awesome Icons + GSAP + AOS + simpleParallax.js
Model
Claude Opus 4
Output
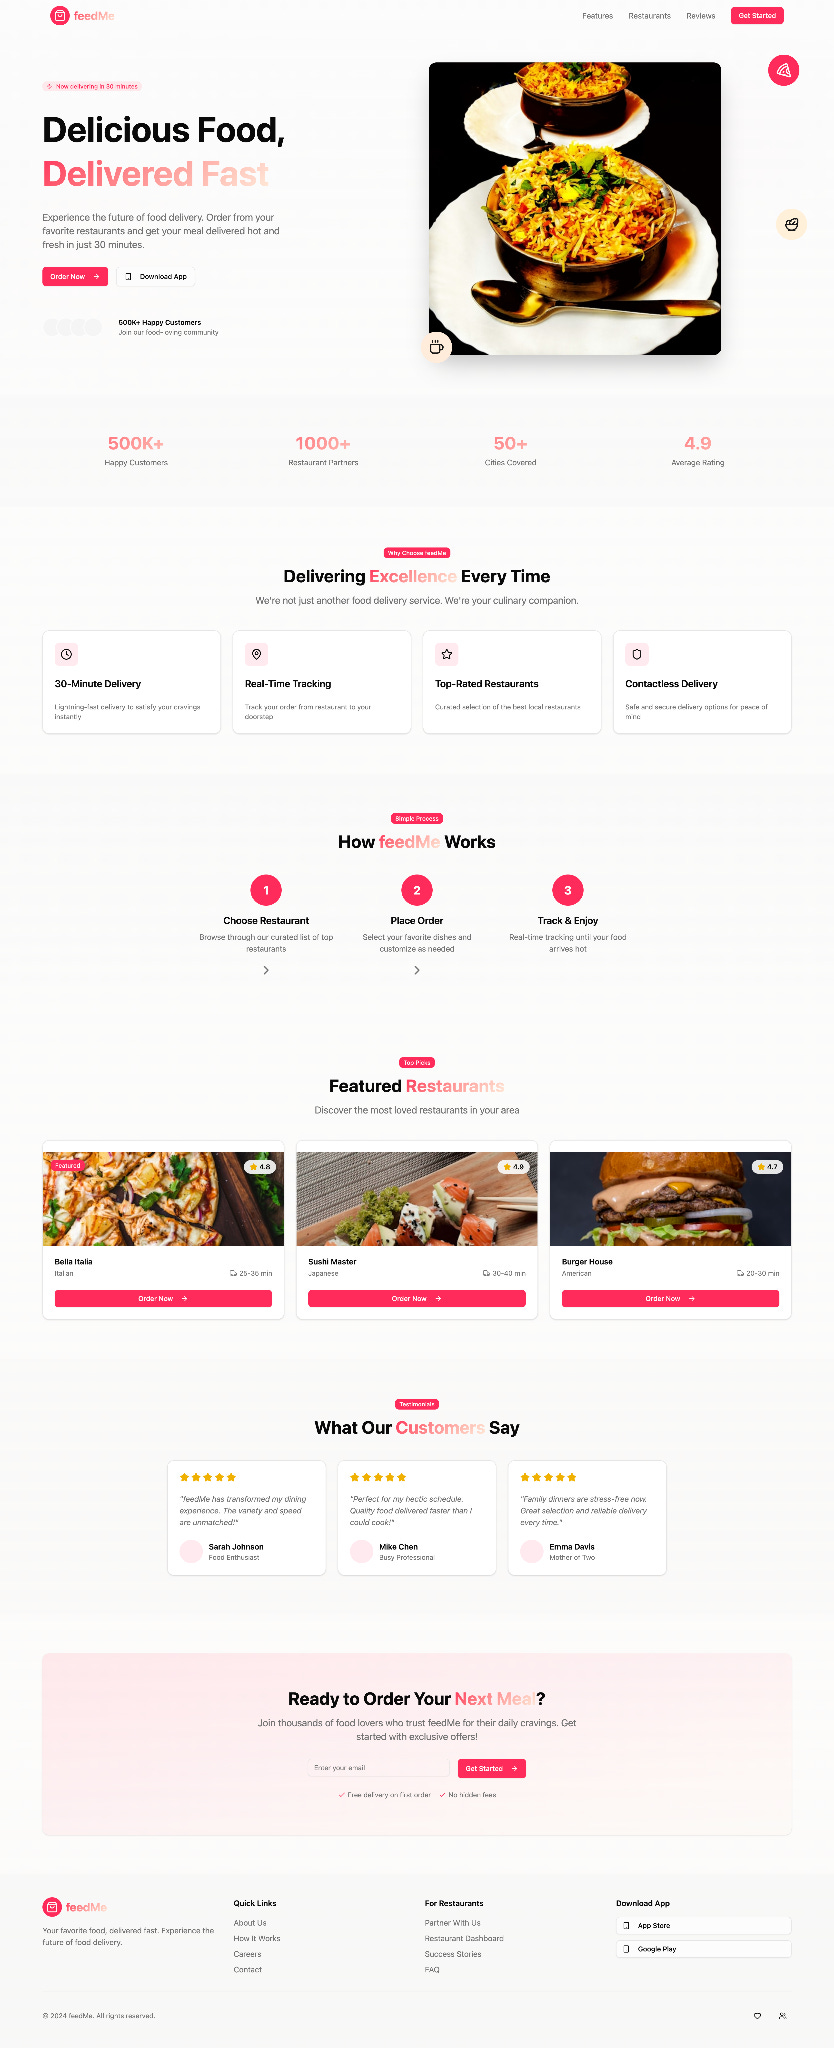
The Verdict
Beautiful and vibrant. The difference is night and day. Claude took every single tool we gave it, the components, the images, the fonts, the animation libraries and orchestrated them into a design that felt cohesive, dynamic, and truly premium. This proves that a rich environment doesn't just help good models; it supercharges great ones.
The Apprentice Builder Test: Gemini 1.5 Pro
Now for the opposite test. I took an older model, Gemini 1.5 Pro (May 2024), and gave it the empty codebase.
Codebase
React + Typescript + Tailwind CSS
Model
Gemini 1.5 Pro
Output
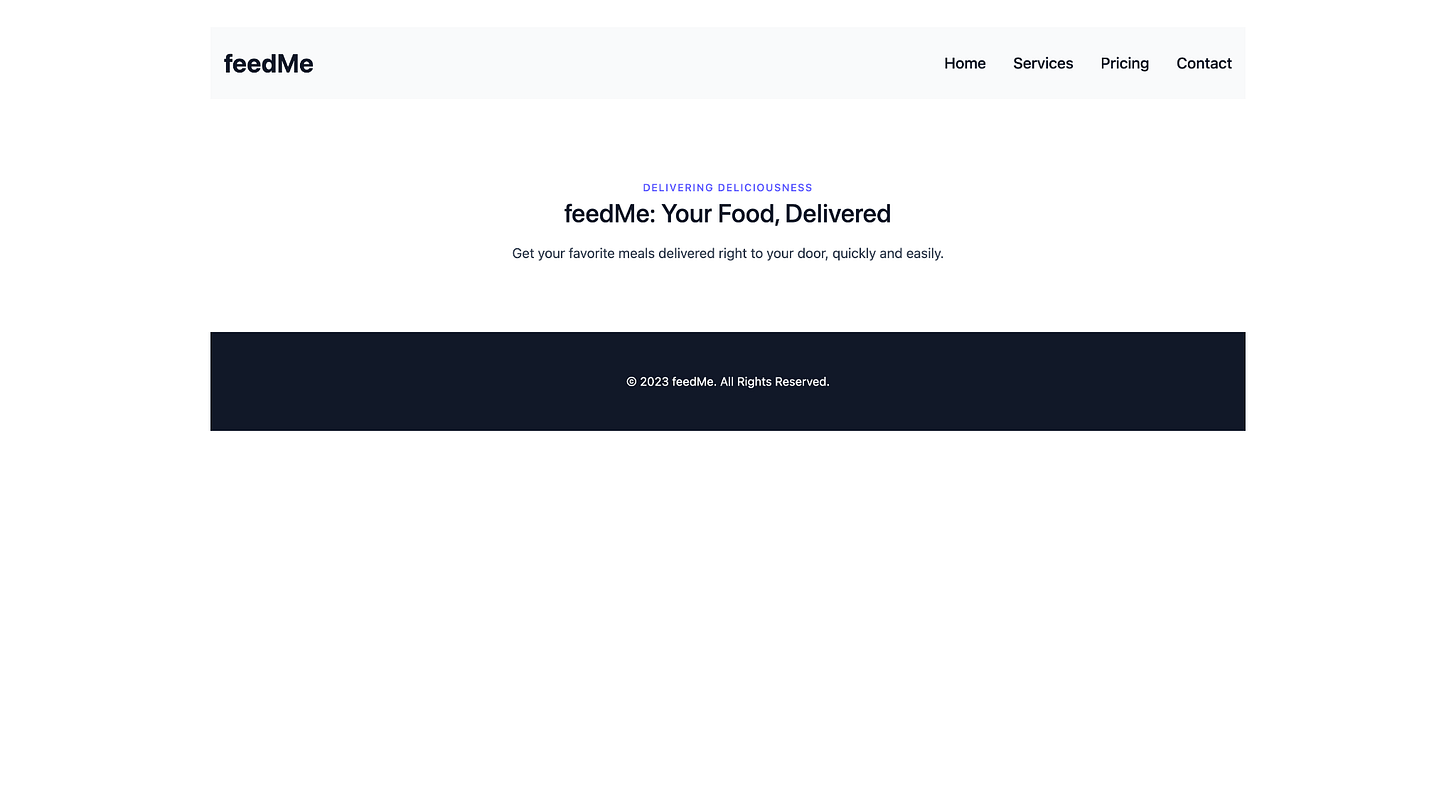
The Verdict
I was quite surprised by the low quality of the generation, I know Gemini 1.5 Pro (May 24, 2024) is very old by AI standards but I still expected more. I guess this also shows just how far AI has come in Web Development in just over a year.
But what happens when we give this less-capable model our full Lego set?
Codebase
React + Typescript + Tailwind CSS + Shadcn (all components) + Images folder + Google Fonts - Inter + Font Awesome Icons + GSAP + AOS + simpleParallax.js
Model
Gemini 1.5 Pro
Output
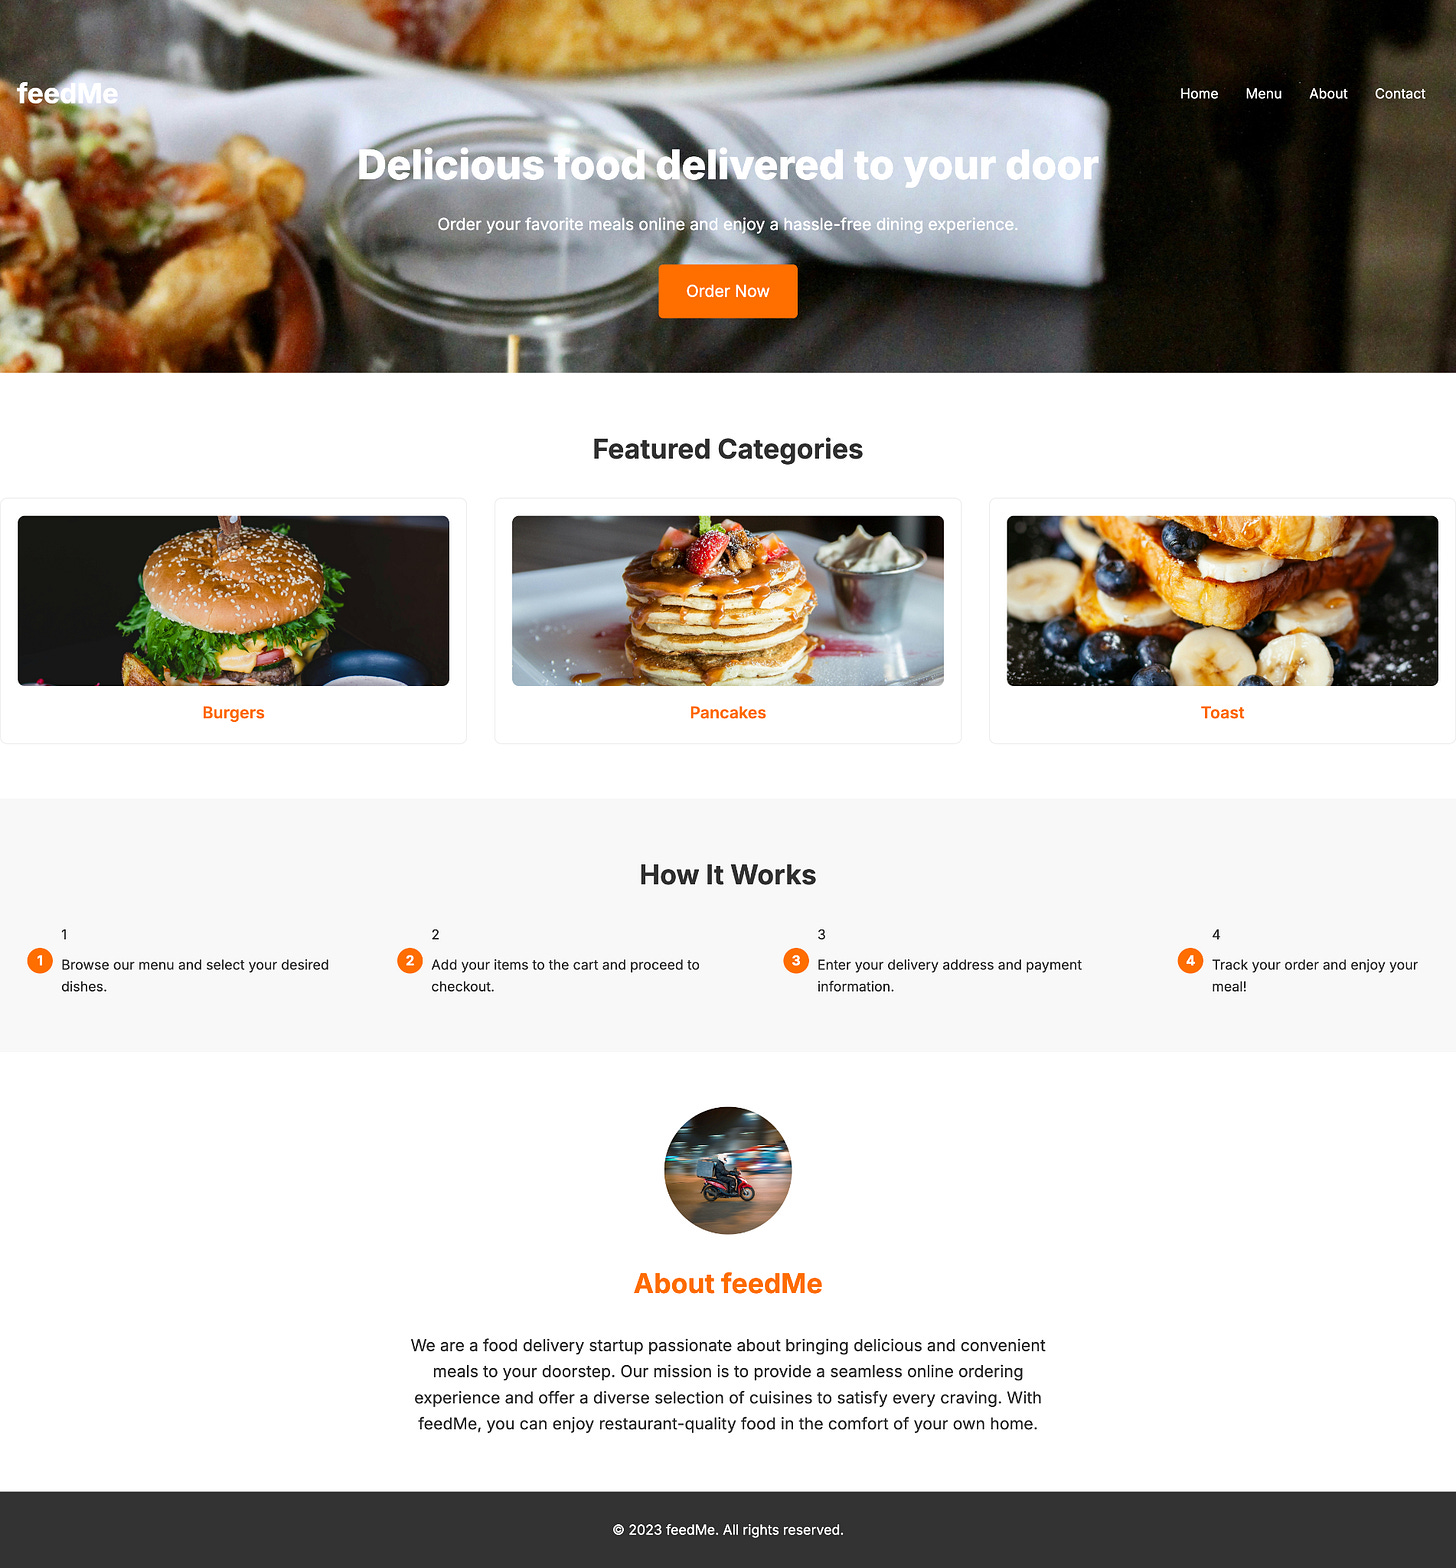
The Verdict
While not an amazing design, it's a massive improvement. The toolkit elevated a failing model to produce a functional, passable landing page. This proves that a rich environment can act as a safety net, rescuing a weaker model from total failure.
Conclusion: The Architect’s Advantage
So, after running through all seven experiments, what’s the big takeaway?
It turns out that the breathtaking quality we see from specialized AI tools isn't just about some hidden, magical prompt. A huge part of their success comes from providing the AI with a curated, high-quality environment to build in. The difference between the "mud pile" of an empty project and the "Lego set" of a well-prepared one is night and day. By treating our codebase as a toolkit we're handing to the AI, we can consistently and dramatically improve the visual quality of its output.
Now, it’s important to be clear about what this experiment is and what it isn't. This is just one powerful lever you can pull to get better results.
- We intentionally ignored advanced prompting. To prove a point, I kept the prompt as simple as possible. There is a whole other world of prompt engineering, chain-of-thought, providing examples, asking for specific formats that can unlock even more potential. The real magic likely happens when you combine a well-architected codebase with a masterfully crafted prompt.
- This was purely a design exercise. A flawless landing page that looks amazing but has weak, uninspired copy won't convert. Visuals are only half the battle. This experiment didn't touch on optimizing for messaging, conversion rates, or SEO, which are all critical disciplines in their own right.
Even with those caveats, the results give us a clear and actionable strategy.
Key Takeaways for Your Next Project:
- Think of Your Codebase as a Performance Multiplier. Our experiments showed that a rich environment doesn't just help; it supercharges. A great model like Claude Opus becomes phenomenal when it has the right tools. You're not just raising the quality floor; you're raising the performance ceiling.
- Use Your Codebase as a Safety Net. A well-prepared environment can rescue a less capable model from total failure. As we saw with the older Gemini model, the toolkit turned an unusable output into a functional starting point. This makes more accessible or cheaper models more viable for real work.
- Start with the Highest-Impact "Bricks" First. If you do nothing else, focus on the two biggest levers we found: installing a component library and providing local images. These two steps will get you 80% of the way to a better design with a fraction of the total effort.
The next time you're disappointed with an AI's output, don't just blame the model or spend another hour rewriting your prompt. Take a look at the environment you've placed it in.
A great set of Lego bricks can make any builder a master.
Thanks for reading Lessons In Launch! Subscribe for free to receive new posts and support my work.